Supplies:
Various colored ribbons
Stapler
Hot Glue gun
paint
chipboard
buttons
Cut all of your ribbons that you plan on using in various lengths. This length is really up to you...if you want a loopier wreath, cut the pieces longer. i would mix it up and go with the longest piece about 3-4 inches at most. All depends on how large of a heart you use as well. I had PLENTY of ribbon left over after completing this one. I cut up approximately 4 yards of ribbons here.
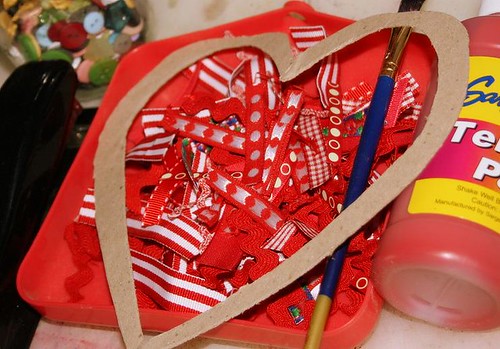
You can cut your heart easily out of the chipboard by folding it in half, then cutting out half a heart...this way both of your sides are symmetrical. Then after you have your main heart cut out, cut out another heart inside tht to get the outline of the heart you see here!
Step #1
Paint your chipboard heart with coordinating paint. That way if there are any spaces in between your ribbons, you won't really be able to tell because of the paint!
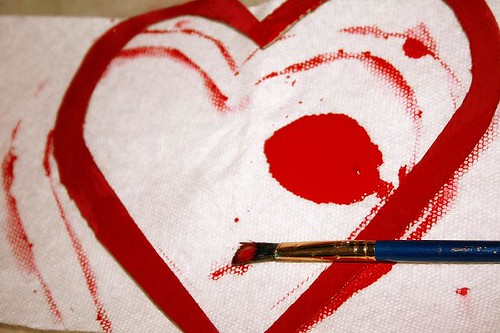
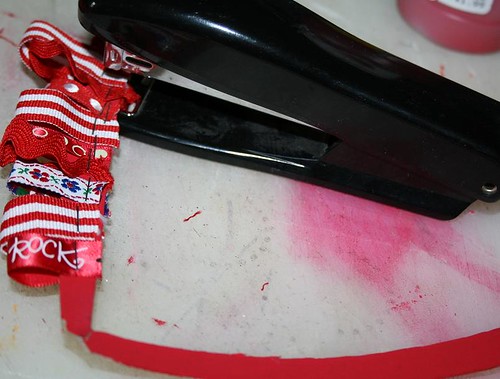
Step #2
Start looping your ribbon around the chiboard heart as shown and staple into place.
Another option is to use your hot glue gun, as shown below...which I personally foudn to be a lot easier and quicker this way. just line up your ribbons beside the heart the way you want them, run a short bead of hot glue and set ribbons into place like this.....
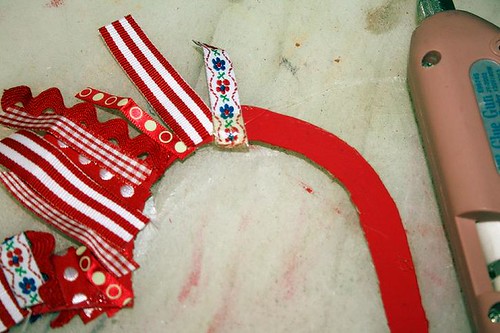
This is the front side showing....you will need to turn the heart over and glue them to the back side as well completing the loop.
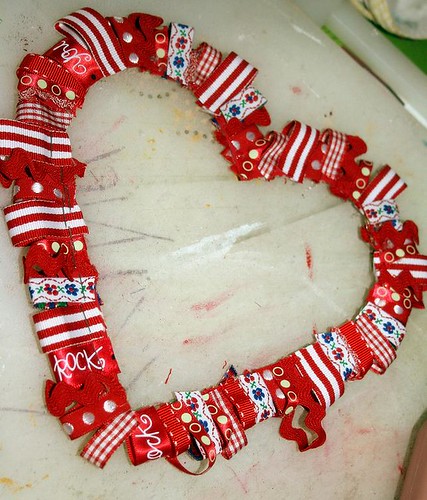
When you are finished with the ribbon attaching, your heart should look something like this....
Step #3
Now start gluing your buttons down around the inside of the heart to cover up the staples or any ends of the ribbon as shown here...
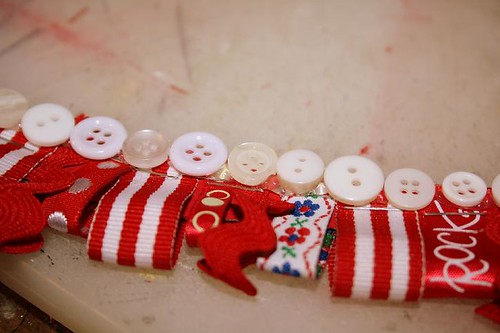
Keep going all the way around the inside....layer up some buttons for added dimension and you are finished!!!

I just have this hanging on a nail on the wall...I like the tilted angle and both of my hearts are now hanging together. You could use some coordinating ribbon to tie at the top to make a hanger of sorts or you could even use this as a cute picture frame!!!
15 comments:
This is so cute!!!
that is SUPER cute. Thanks for sharing!
THANKS for the quick class! I loved the heart you posted at Bad Girls! This is so cute! I was wondering how you made it.
Thanks Michelle! this is sooo cool!
It's beautiful! Thanks for sharing :)
Oh absolutely love this girl!!!!! Thanks for sharing!
Rach XOOX
This is really cute! Thanks for sharing!!!!
Adorable. TFS
Awesome tutorial! Thanks so much for sharing :)
I think this is the CUTEST wreath I've seen in a long time, I never ever would have thought of it! FANTASTIC tutorial girl!
I fully expect you to sell these suckers on etsy!!!
Wow...........you are so talented and creative.
Gonna have to do one of these!
Very cute!!!
awesome way to use up that ribbon and button stash most of us have....tfs.
And check out my blog...you've been tagged girlfriend!!!
Great tutorial and wonderful idea! This is so adorable. I think I have to make one!!
Post a Comment